Tuesday, September 25, 2012

Squish Squesh Squash!! It's Fall!

Fall has arrived! Hurray.....A season I have no immediate attachment to as I have lived in either Central Coast or Southern California for all my life, and the only seasons we really have are very hot sunshine or not so hot sunshine. I do envy those of you who get to frolic about with the leaves changing colors, and the warm beverages that you drink by the fire place mantel while talking about the leaves and the changing colors... However, I know what comes next after those lovely leaves do, in fact, fall. And winter is a cold hearted 'B' word, and I will have nothing to do with that freezing cold! So I high-five you courageous folks that get to appreciate all four seasons, and the ups and downs they entail. This girl will stick with the two seasons she knows best for the time being, BUT I will enjoy fall foods.


Take that orange, red and whatever else colored leaves! I have spaghetti squash, warm delicious vegetable marinara sauce, and greens! Quick cold story...One year I made a brave decision to venture to Boston to visit a friend over Thanksgiving. I was told that it wouldn't be very "wintery" yet. Turns out when the time arrived to go, the East Coast was hit with an early winter storm.... Guess what girl stayed indoors the majority of the time? Oh, this girl? The one typing? You are correct. I have a distinct memory of my earrings feeling like they were frozen to my ears. (Enter my flare for drama as a teenager, can you image being my parents? lol)

My youth was spent with sunshine, lows in the 40s maybe, and in a world where flip-flops are worn almost year round. I blame the weather for not toughening me up!! Looking at my lack of ability to handle anything under 40 degrees Fahrenheit is a touch depressing. Thank goodness I was exposed to fantastic wonderful fall/winter foods though! Winter squash varieties are some of my most favorite things ever! So in honor of a season I don't know well, but respect others that do I present today's delish dish:


Spaghetti Squash w/ Heavenly Veggie Marinara
serves 4-6 people
gluten-free

Ingredients:
2 medium spaghetti squash
1 jar of basic marinara*
1 head of broccoli (chopped)
1 small/medium yellow onion (chopped)
4-5 cloves of garlic (pressed)
8oz of mushrooms (chopped)
1 cup sun dried tomatos (chopped)
4-6 handfuls of baby spinach
1 tablespoon avocado oil (grape seed oil may be used, or olive oil)
1 teaspoon dried basil
1 teaspoon dried thyme
1/2 teaspoon red pepper flakes
salt and pepper to taste

*What is this you see? A jar of something? Trust me, there is a fair amount of prep work to this recipe and in order to make it fun, and keep it an easy meal for you (and me) to make during a busy week you will thank me for this. Please make sure it is a low sodium, organic, and gluten free sauce. 

Preheat oven to 375 degrees.

Prep your spaghetti squash by poking a few holes in each one with a skewer. Be careful! No casualties of war in your kitchen please. Poking a hole or two in the squash prevents it from bursting while baking. Place both squash in a baking pan, and place them in your oven. Cook for 45min to an hour. They are finished when you can easily poke through the rind with a knife. (You might be asking why not just throw them into the microwave? You can do this, but I would suggest against it. In fact if you can, just never use the microwave, lol. They nuke nutrients out of your food, and have a host of other issues: http://www.naturalnews.com/022015.html) Food for thought. 

While your delightful squash is baking away, lets get your sauce ready! If you read last weeks post then you'll know its time to get your prep bowls ready!! In a large sauce pan, or wok throw in your oil, chopped onions, and garlic. Cook on high heat for 5 minutes, or until onions start to lose color. Stirring often. Next add the sun dried tomatoes! 


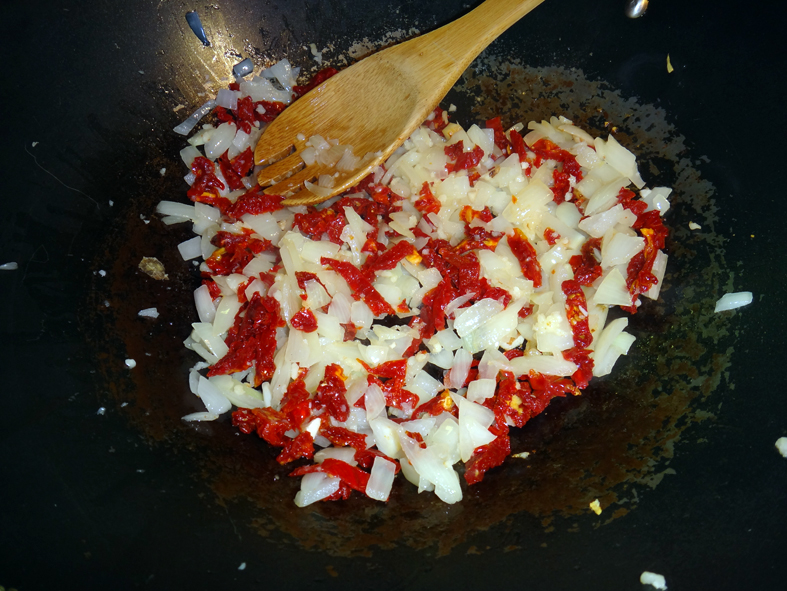
Cook the sun dried tomatoes with the onions and garlic for a few minutes letting the flavors blend. Keep up that stirring. Then add in your mushrooms, whoo hoo. At this time also add in your spices (basil, thyme, red pepper flakes). Cook for 4 to 5 minutes more. 


Lastly add in your broccoli, and turn the heat down to low. Keep stirring often letting all the flavors blend together. You don't want to turn your broccoli to little mushy trees, so keep that heat on low and cook for another 4-5 minutes. 


Finally add in the sauce! At this point you can leave the veggie and sauce mixture on low heat/simmer while waiting for the squash to finish cooking. Stir occasionally to ensure nothing is burning to the bottom of your pot/wok. 

Once your squash is cooked remove from the oven, and give it a few minutes to cool down. Then cut the squash in half, and get ready for the fun part! Scoop out the middle area with the seeds and discard. Then with a fork go to town, and scrape the sides of the squash. This will create strings of squash that look like and taste like noodles (thus the clever name of spaghetti squash). Once you have scraped all the meat of the squash out, then get ready to plate. 

Take a handful of baby spinach and place it on the plate. Next scoop a serving of the squash noodles over the spinach. The heat will wilt the spinach, and give an extra yummy nutrient punch to your meal. Then pour a serving of your sauce on top. And wha-lah! A insanely delicious fall/winter meal for anyone, anywhere. ;)

Tuesday, September 18, 2012

BFF Necklace Partners

Do you remember those ridiculously cheesy, and unfortunately clique inspiring, BFF necklaces that everyone was wearing back in the day? Do you remember how wonderful it was when someone gave you a chain with half of a heart engraved with the words "st ends ever"while they proudly wore theirs "be fri for" around their neck? Ah to live in simpler times...Times where a necklace offered you the protection of a never ending friendship. Well I'm bringing it back, and I'm friending my prep bowls. Yes thats right you read correctly, this once sane woman will be BFF necklace partners with her prep bowls. Without these little charming bowls that hold my chopped up veggies I would be lost in a sea of counter space!!

Look what prep bowls help make!!

I have a plethora of prep bowls, and I cherish them all. If you came to my kitchen and borrowed one and didn't bring it back; I would know. I would also call you often and leave passive agressive messages in your voicemail box like this: "Hey this is me, and I was just calling to see if you cooked what you were cooking. Maybe if you need any help cleaning all the dishes... You know just wondering..." Why passive aggressive you ask? Because confrontation and I are not BFF for life. It makes me uncomfortable, makes my face cringe, and possible makes my palms sweaty. That last part hasn't been confirmed, I'm still looking into it.

But enough about all that, let's talk about what wonderful foods my prep bowls help me "prepare"<-see that, that is where the word 'prep' comes from. You're welcome for pointing it out. Feel free to tell your friends what you have learned today. Maybe give them a necklace of half a heart with some gibberish on it while you are at it. You'll be the life of the dinner party..... Alright, no more side bar conversations! For your taste buds I present to you an entree for you and several friends!


Sweet Potato topped w/ Coconut Greens
serves 4 (adapted from thekitchn.com)
gluten free

Ingredients:
4 medium/large sweet potatoes
1 cup quinoa
2 cups water
1-2 tablespoons oil (I am a big fan of avocado oil as of late!)
1 yellow onion (chopped)
5-6 garlic cloves (pressed)
1 tablespoon ginger (grated)
1/2 cup dried golden berries (chopped)
2 tablespoons fresh lemon juice, and zest from one lemon
1 teaspoon red pepper flakes
1/2 can chickpeas
1/2 can cannellini beans
3-4 stalks of celery (chopped)
1/2 pound spinach (chopped)
1/2 pound kale (chopped)
1 can coconut milk
1 teaspoon salt
1 teaspoon ground ginger
2-3 ripe avocados
Cilantro or Basil to decorate

All right first thing preheat that lovely oven of yours to a whopping 400 degrees. Wrap your sweet potatoes up in some foil, poke the wrapped up potatoes each a few times with a fork, and then place them in the oven for an hour. 

Once you have the potatoes in the oven set up your quinoa on the stove. Pour the 2 cups of water into a pot, and add in your 1 cup of quinoa. Bring the water to a boil. Once it starts to boil, turn the temperature down to simmer and cover. It should take about 15 minutes to cook. Once finished you can let it cool off to the side. 

Now the fun part! Get out your prep bowls and lets start chopping! I placed my chopped onions in one bowl, the garlic, grated ginger, golden berries, lemon zest, and red pepper flakes in another. Then I have my beans and celery in yet another bowl. When we get to the cooking you will be so pleased these are all ready to rock'n'roll. 


Using a large pot pour a tablespoon of avocado (or olive) oil into the pot, and add in your chopped onions. Cook on high heat for 5-7 minutes, waiting for the onions to brown slightly. Next pour the bowl in with the garlic, ginger, golden berries, lemon zest, and red pepper flakes. Stir everything around blending all your flavors. Stir continuously making sure your ginger doesn't burn to the bottom of your pot. 


Cook like this for another 5 minutes. Now you are ready to pour in your beans and celery! Keep stirring often and cook the beans for about 5-7 minutes or until they look golden. 


You are almost done, next put the kale/spinach mixture into the pot. Keep up that stirring. 


Once the greens are wilted pour in the coconut milk and add the 2 tablespoons lemon juice, salt and ground ginger. Once you have stirred in the coconut milk add in your cooked quinoa. You don't have to add all of it, but put enough in to create a yummy texture. Cook on medium heat for about 5 minutes.

About this time your potatoes should be finished, and you are ready to create a masterpiece. Cut your sweet potatoes in half and plate them. (Be careful as they will be pretty toasty!) Next take your avocado that you purchased for this meal, and scoop it out onto the potatoes, about a half an avocado per potato. The heat will melt the avocado into the potato making you and your friends VERY happy. 

Once you have the avocado down, scoop the coconut greens mixture onto the potatoes. Pile as high as you would like. Then sprinkle with your chopped cilantro or basil (whichever you would like you're the boss) I decorated mine with sriracha as it is spicy and wonderful, you don't need to do that if you don't want to. :)

Monday, September 10, 2012

Sherlock Holmes... the Second

Last night I had a dream that I was a detective at a spooky abandoned resort area, and I was trying to track down a killer. Not only did my bad ass detective skills solve this grimy drama I was also able to save the resort and reopen it. Needless to say I feel insanely accomplished, and probably don't even need to do anything else productive today as I hit my quota with the awesomeness that is Detective Casey. However, I went to Farmer's Market yesterday with the mind set to make something delicious to share...and I cannot let these yummy veggies down!

Gorgeous bounty from Farmer's Market the other day should prove to be useful for this post :)
Now for those of you that are following us on Facebook or Twitter you know that the manfriend and I are doing a raw cleanse. This means that cooking up something in my home would be mean and torturous to our brains. It also means that raw cleanses might affect my dream scape at night....I should look into that. 

So let's talk cleanse for a second: why would you do that? Is it really all that great for you? Where do you get your vitamins/nutrients/anything filling from? These are all important questions that I will let important people answer: http://www.mindbodygreen.com/0-2372/How-to-Juice-Fast-Safely.html. This information about juice cleanses is very important, and I hope you get a second to check it out. Now we aren't going full blown into the land of juice cleanse in our home this time, and instead have opted for 3 large raw smoothies as meal replacers and then snacking on raw fruits and veggies. 

This pic is too cool not to share! Yeah juice! Credit: http://jezebel.com/
Enter my yummy little work around so I can do a write up on a recipe, lol! I know you were worried that I might fail you this time around, but let me remind you that you are dealing with a true blue detective. (Sherlock eat your heart out.) I will get to the bottom of the problem, solve it, and be awesome! Here is a recipe for a salad PACKED with vitamins, nutrients, and overall fantastic for your health! Whether you are on a raw cleanse or just looking for an extra delicious healthy addition to your plate.


Insanely Healthy Salad!
serves 2
gluten free 

Ingredients:
2 small zucchinis
1 bunch of skinny asparagus
1 very ripe avocado
4-5 tablespoons fresh squeezed lemon juice

The base of your salad is the zucchini and asparagus. Cut your asparagus up in small bite sized pieces. I like to do it on an angle so they look fancy. Then use a peeler and peel the zucchini long ways. Keep peeling till you have a good amount of zucchini 'noodles.' Place both in a bowl and set aside. 

To make your dressing place the pitted avocado in your blender. For best results you are really going to want to find a very ripe avocado. Add in the lemon juice, and blend. You are going to get a citrus-avo paste. Pour this into the bowl with the asparagus and zucchini, and stir everything together. **Note, if you aren't doing a raw cleanse feel free to add salt and pepper to taste. 

Presto, you are ready to serve your Insanely Healthy Salad. There isn't any oil in your dressing (huge plus), you have used all raw ingredients so your body can absorb all the nutrients (sometimes cooking can cook out some of the vegetable's nutrients), and all the ingriedents are insanely good for you!

Delish!

Wednesday, September 5, 2012

Bringing NYC Ramen Home :)

I recently was in NYC for a week and began a love affar. The kind you read about in novels....well novels that have recipes, and brightly colored pictures of food...like a cookbook novel. The food in that city is devine, and the creme-de-la-creme was the Japanese food -> Ramen! I'm not talking about the $0.12 bag of instant salty noodles you find on the bottom shelf at any quickie-mart that make you gassy and feel self-loathing after eating. No, no, I am talking about the deeply satisfying, cooked to perfection, overflowing flavorful soup that you can only really find at a true Japanese restaurant.  


Look how cute the avocado acts as the "egg" with the corn as the "yolk" in traditional ramen :)
Now, you could quite possibly be asking yourself "I am fairly certain ramen is a pork based soup, what is this vegan lady ranting about?" Well yes, you would be correct, it is a pork based broth with large amounts of said pork used as a topping in the soup. I was told that I would never fully appreciate the joy of ramen if I didn't eat the pork filled version. However, I am stubborn (and also quite squeamish when it comes to the idea of eating pork) and I fell in love with the vegan/veggie friendly versions of this soup. This was much to the chagrin of my dining companions. Ah one of the many joys of ordering food as a vegan...

I wanted to prove that a person opting to not eat pork can not only enjoy this soup at a restaurant, but also in their home!! Enter my grand master plan to bring this soul warming, belly filling, fantastical delight to my home kitchen. This plan brought me to the local Asian Food Market (a.k.a my new favorite establishment) and opened my eyes to trillions of tasty treats! Most of these treats, however, were labeled in languages I will probably never master (forgive my ignorance) and I had to pester a kind woman working there to walk with me to help pick out ramen making fixin's. Did she love having a crazy lady as a shadow for 25 minutes... I'd like to think so...


My bounty, thanks poor woman I pestered! Hope the rest of your shift was crazy lady free!!
Yes this recipe is a little out of the box, and will take you to far corners of your supermarket comfort zone, but the end result is well worth it! I can barely stop to type this out as I am shoveling ramen into my face at the moment. And yes, turns out that is hard to do when you are eating with chopsticks. Oh yeah, we're real authentic over here :)

Super Spicy Mushroom Ramen
serves 6-8 people
can be gluten free if you purchase rice noodles (read your labels please!)

Broth Ingredients:
4 cups mushroom broth (I used Organic Pacific Natural Foods)
4 cups water (from your soaked mushrooms)
3 large tablespoons of red miso paste
2 tablespoons sweet rice seasoning
2 tablespoons minced ginger
8-10 minced garlic cloves
Half a stalk of lemon grass cut in thirds (strictly for flavor do not serve with soup)

Toppings:
2 cups dried shitakii mushrooms (soaked in warm water for 30min)
1 bunch of green onions
1 head of broccoli
1/2 a head of red cabbage
1 & 1/2 cup of shredded bamboo
1 can of corn
3-4 avocados
1 package of japanese noodles 

Spicy Paste:
3 serrano peppers
2 tablespoons water
1 tablespoon lime juice
1/2 tablespoon chili garlic sauce/paste
salt to taste

Oh yes, get ready for a labor of love. But stick with me on this one, you and whoever is lucky enough to be on the receiving end of this dish will be SO happy!!

Pre-Step: Set your oven to broil.

Step one, heat up a pot full of water, but do not let boil. When it is hot to the touch turn the heat off and put your dried shitakii mushrooms in the water. Cover and let sit for 30 minutes. While you wait you can chop up your other toppings and set them aside (broccoli, green onions, and cabbage). 

Step two, in a large pot pour your 4 cups of mushroom broth. Then once the mushrooms have finished soaking drain and take 4 cups of the water and add to the large pot. Place the drained mushrooms in a boil and set aside.

Step three, turn the heat to high on your broth and add in the red miso paste, ginger, garlic and sweet rice seasoning. Bring to a boil for 10 minutes. 

You're kitchen is going to be as messy as mine, nah-nah-nah-nah ;-p
Step four, while you are blending the base of the broth, start in on the spice! Place your whole 3 serrano peppers on a baking sheet and place in the oven for 10-12 minutes. You are looking for the peppers' skin to start to bubble. Once they are ready remove from the oven, and turn it off. Wait for the peppers to cool slightly, and remove the skin. Then cut the peppers open and remove the seeds (leave a few if you want a spicier broth). Place your skinned and seeded peppers into your blender, and add the rest of the spicy paste ingredients. Blend until a paste has formed. 

Step five, carefully add the spicy paste to your broth. I suggest doing it a spoonful at a time and tasting the broth as you go. It gets pretty toasty pretty fast! Also add the lemongrass to the broth for additional flavor. Boil for 5 minutes. 

Step six, add the mushrooms and the broccoli to your broth and boil for 5 more minutes. 

Step seven, cook the noodles in a separate pot per the package instructions. Once they are done you are ready to create your ramen masterpiece!

Assembly time: Pour 2 cups of broth into a bowl (making sure to get mushrooms and broccoli in the bowl too). Add a large bunch of noodles to the bowl. Place a handful of the green onions, red cabbage and bamboo on the sides of the bowl. Cut an avocado in half and place a half in the bowl (you can be adorable and put corn in the middle of the avocado to act like the egg you see in traditional ramen). Also add in the corn to one of the sides of the bowl as well. And TAH-DAH you have done it! A yummmmmmy ramen meal for you and 5-7 other people!

YUM!